VENTILATION AND WALL CONSTRUCTION / Container darkroom part 2

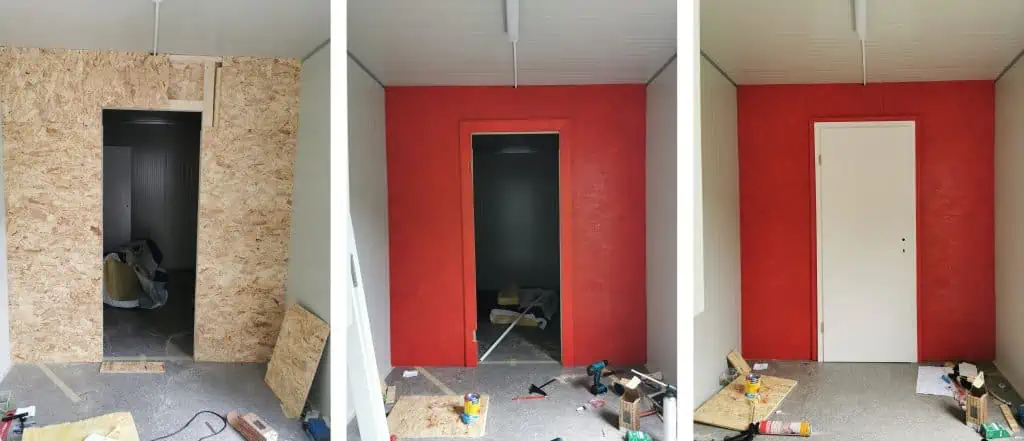
I am crazy excited to start working and designing my own working space. As I said in my previous post I will be splitting the container thru the middle to get a darkroom and lightroom space. Because of this I had to construct a partition wall. I used 8x5cm wooden slats to build a frame. I was using a miter saw which really makes everything so much easier. Also the walls of the container are made of metal and insulation which makes them only 4,5cm thick. I had to be careful when selecting the screws so they were not too long and that they were still thick enough to assure good bondage. It took me a few hours to complete the frame and screw it to the container walls. Next step was covering the walls with 15mm OSB plywood which took much longer as each plate had to be measured and cut with a circular saw. In between each side I also laid glass wool for heat and foremost sound insulation. I had to leave an empty space in the middle so the 60cm door would fit. OSB plates were coming together nicely so I could proceed to the next step.
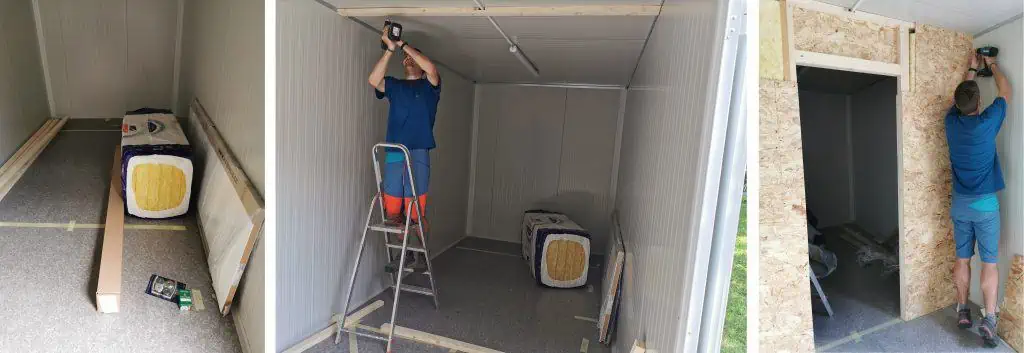
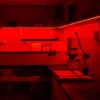
I am a very precise person so all the measurements and cuts that I make fit really snugly which let me tell you is not the best thing when installing a door frame. I had quite a lot of trouble installing the frame because everything had to be perfectly aligned, leveled… At the end All I had to use was just a few screws, a little bit of propane foam to make it light tight and I had to make an additional 1cm thick frame around as the door frame was designed for a bit thicker wall. I went for a 60cm wide door in the middle so the left and right walls are free for installing cabinets, desks etc. When the wall was finished and doors mounted I decided to paint the wall. Vibrant red came on my mind first because it in one way represents a darkroom environment with all the safelights on. For the final touch I installed white plastic white edging which also helped eliminate light leaks.
As all of you that work in the darkroom, chemical labs or even just tight spaces now how important is ventilation. Darkroom ventilation is one of the most important factors for keeping the environment healthy. I am working with many different chemicals from acids to other volatile liquids so darkroom ventilation was high on my list of priorities. I again did a lot of research for a good and not too expensive ventilation. All I knew was that I wanted air to enter on one side of the room and exit at the end + it should not be too noisy. For the incoming air I went for two toilet ventilators, and to pull the air out I bought an inline fan. For the machines I paid 150eur altogether so it wasn’t too expensive.
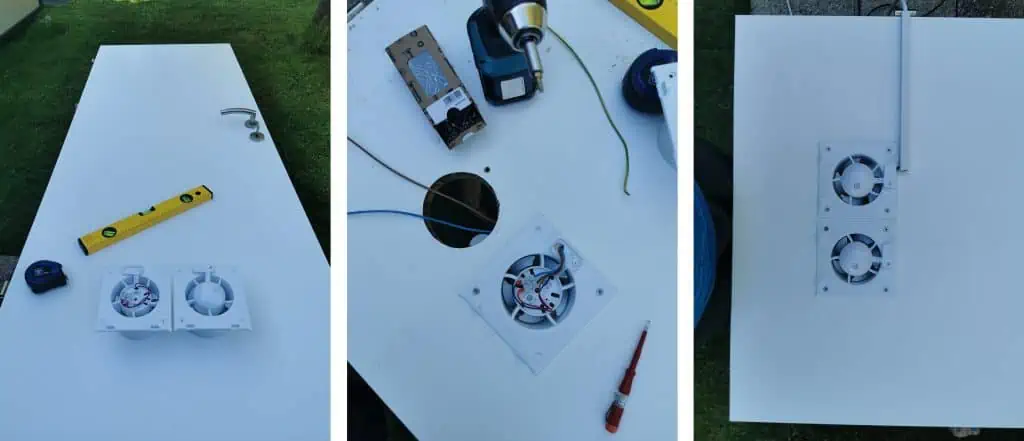
Two toilet fans I bought were installed on the door to suck in fresh air. They are very quiet (30dB) and can together move 140 cubic meter per hour. The installation went smoothly, drilling and sawing out two holes was easy. The wiring was a bit more difficult, especially as I wanted to hide all the cables in the door. I managed to instal everything as I wanted and connect it to the switch. In the following posts I will be making a darkroom sink, ventilation for the sink etc.
Thanks for reading!
If you would like to see more content like this you are warmly invited to my Patreon page. Thanks


