


Building a Dream Darkroom: New Zebra “factory” is Finally Taking Shape!
The past few weeks have been intense here at Zebra HQ—and I’m finally excited to share some real, visible progress on our new darkroom build!We’ve officially moved beyond the invisible grind—the kind of hard work that doesn’t look like much when you walk by but is absolutely essential (you know the kind: digging, prepping, measuring, scratching your head over measurements again). Now we’re into the satisfying part: walls going up, spaces taking shape, and a glimpse of what the final darkroom will actually look like.
Building a Darkroom Inside a 100-Year-Old Hayrack
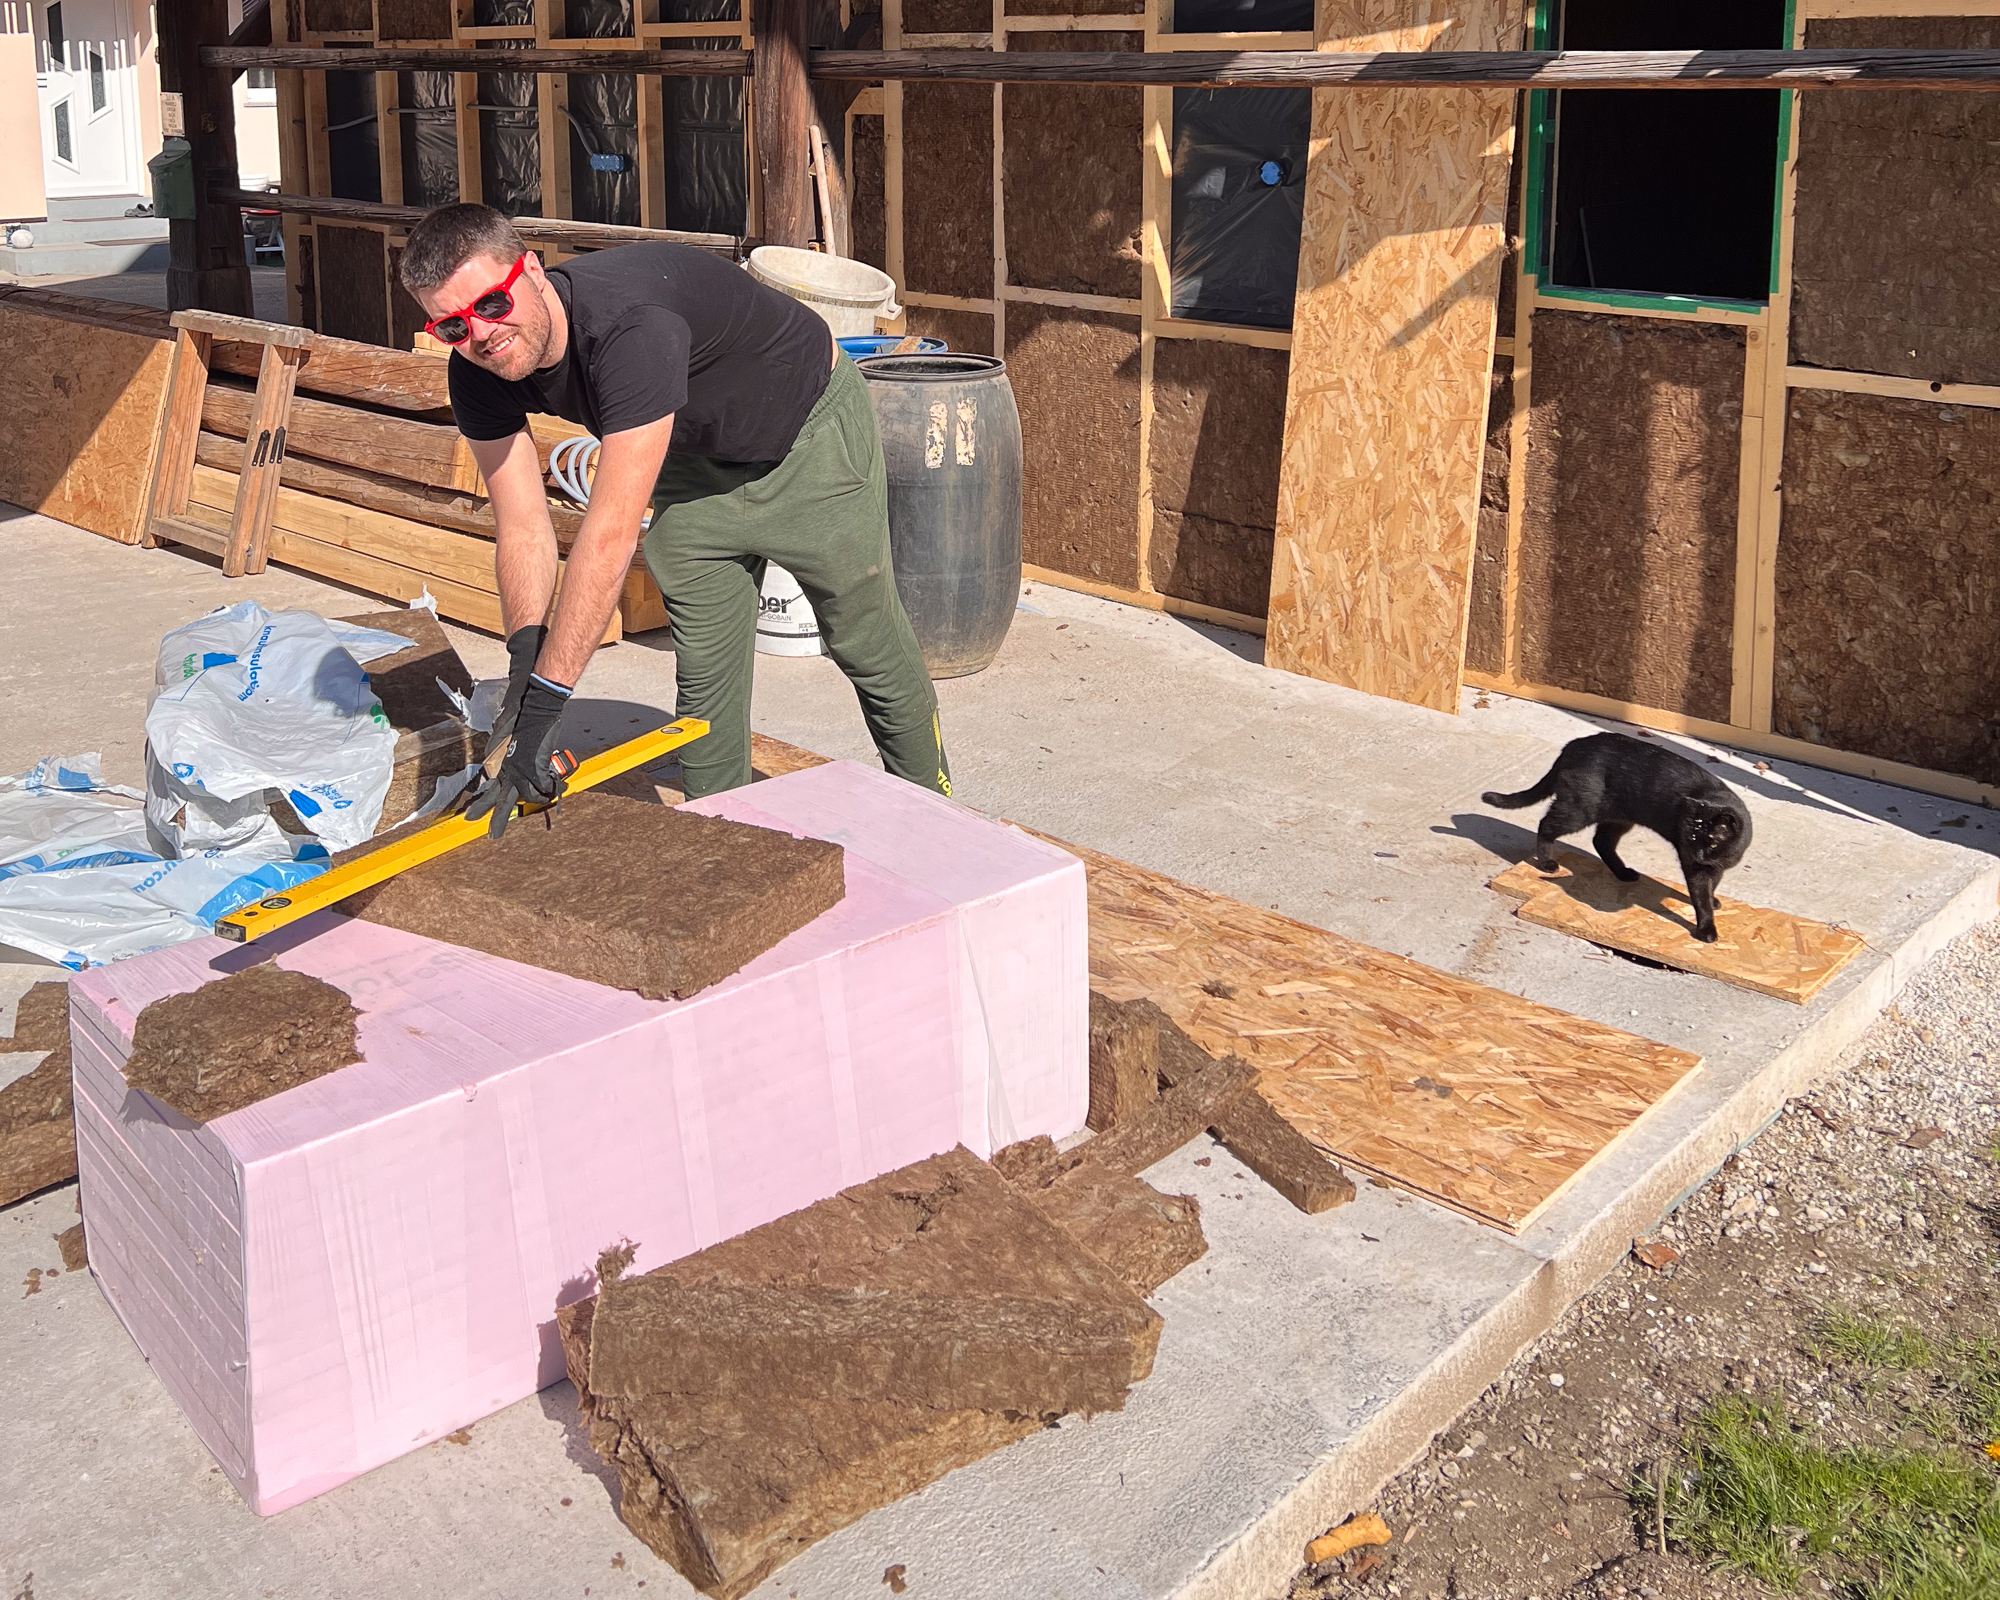
As many of you already know, we’re building this new space underneath a beautiful 100+ year-old, two-story wooden hayrack. We made the decision early on to preserve this historical structure by building the darkroom inside it, rather than altering or covering it up. And since the hayrack is made entirely of wood, it only felt right to continue the theme and build our new space in wood as well.
Our first major task was completely renovating the ceiling. That alone took some serious time and care, but it gave us a strong, clean base for the rest of the build—and it opens up the possibility of expanding into the second floor later on when the time is right.
With the ceiling done, we got to work framing the walls, both inside and out. Once the wooden frames were in place, we closed them up using OSB panels and added insulation using glass wool insulation boards. This will help us maintain a steady climate inside the darkroom—super important when you’re working with light-sensitive materials.And yes, I had my little 2-year-old son by my side helping out through it all. If you’ve ever had a toddler “help” on a construction site, you’ll know exactly what I mean when I say—welcome to the Zebra family!


Water, Electricity, and All the Hidden Systems
As the walls went up, we also started installing all the major systems: water lines, electrical cables, and everything in between.
Huge shoutout to the electricians—honestly, I don’t know how they keep track of everything. In a darkroom, it’s not just your basic lights and sockets. You’ve got red and white lighting, ventilation, drying cabinets, the coating machine, backup systems… it’s a whole ecosystem. Seeing a dozen cables dangling from the ceiling and walls might look like chaos to most, but somehow they map it all out in their heads.


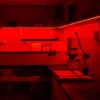
Let’s Talk Ventilation
Since this is a proper darkroom, we made the obvious (but critical) decision to go windowless—no light leaks allowed. But that creates another challenge: how to keep fresh air flowing without compromising the darkroom environment.
Our solution? A heat exchange ventilation unit. This system will bring in fresh air while keeping the room sealed and light-tight. It’s a game changer not just for comfort but also for health and overall working conditions. I’ll write a full blog post soon about the specific unit we chose and how we’re installing it—it deserves its own spotlight.


Knocking Down Walls (Carefully)
The new darkroom will connect directly to our existing office and packing space, so that meant we had to create a passage between the two buildings. Enter: sledgehammers, angle grinders, and a lot of caution.
My father-in-law and I took on the task ourselves. Here’s a tip: if you don’t absolutely have to cut and hammer through walls in a space that’s already full of stuff—don’t. The dust is insane, unstoppable, and completely disrespectful of plastic covers or closed doors. Still, we managed to contain it with a lot of prep and, afterward, just a simple wet wipe brought the place back to life. Phew!


What’s Next?
We’re getting close now. Here’s what’s coming up next:
- Finishing the electrical installation
- Laying down tile flooring
- Moving everything from my current 6m² shipping container darkroom into the new space
- Installing all the darkroom essentials: lights, plumbing, and a brand-new sink
- Adding new cabinets for better storage
- Building a custom square island table on wheels
That island table is something I’m especially excited about—it’ll be the heart of our workshop space. Not only will it be used during my private workshops, but it’ll also double as a filming table for videos and online courses. That means better content and more resources for all of you, wherever you are in the world.


A Space Built by Hand (and Heart)
This whole expansion project has been incredibly hands-on—every board, every screw, every decision has been made with love and long-term vision in mind.
It’s also a bit of a race against time. The new Zebra Plate Coating Machine is scheduled to arrive in late April, and we absolutely need to have the space ready for it. No pressure, right? 😅
But seeing it come together, step by step, has been incredibly motivating. And knowing this space will allow us to create even better dry plates, gear, and resources for the community makes every dusty, sore, sawdust-filled day worth it.
Thank You for Being Part of This Journey
None of this would be possible without your support—truly. Every plate you shoot, every Zebra tool you add to your workflow, every kind word you share about what we do—it all fuels the fire behind projects like this one.
Building this new darkroom isn’t just about having more space. It’s about creating better tools, offering more resources, and pushing the boundaries of what’s possible in the world of dry plate photography—together.
If you’d like to support our journey further, the best way is by continuing to shoot Zebra plates, use Zebra gear, and share your amazing work with the world. Every order helps us grow and reinvest into bigger and better things for the entire analog community.
Thank you for believing in us—and for helping keep the magic of handcrafted photography alive. 🙏
Stay tuned—more exciting updates coming very soon!
-
 Zebra 4×5 Wet Plate Holder V294,84 € inc. U.S. import fees
 -
 Zebra Standard 4×5 Dry Plates41,56 € inc. U.S. import fees
 -
 Zebra All-In-One Pocket Safelight25,47 € inc. U.S. import fees